Part 1 - Exporting the ECT's
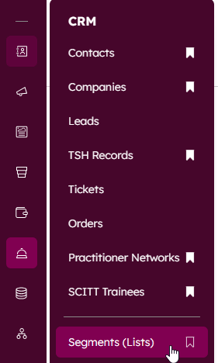
- Navigate to CRM > Segments
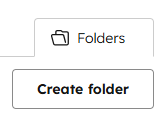
- Once in Segments, choose 'Folders'
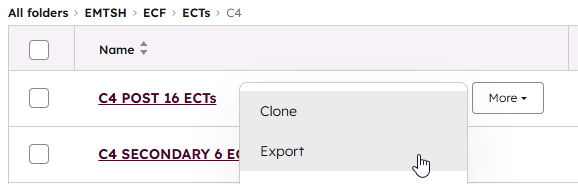
- Then navigate through the folder structure: EMTSH > ECF > ECTs
- Once in the ECT's folder, you will see folders for each Cohort (C4, C5, etc.), choose the cohort folder you are working on
- Hover over the cluster you would like to create a register for, press 'More', and then press 'Export'
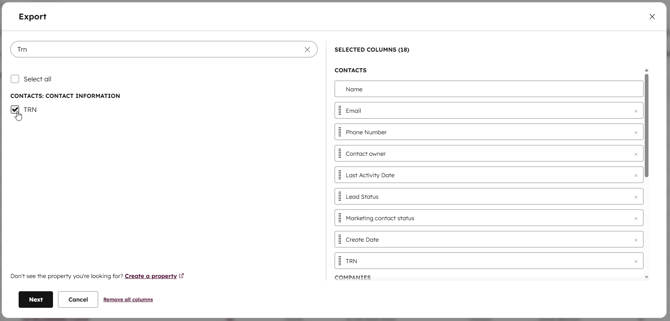
- Once you press Export, you'll be presented with the Export Dialogue box
- By default, Name, Email, and Company Name will be selected columns.
- Make sure to add 'TRN' to the selected columns. If it isn't already selected, use the search bar to search TRN and tick the box.
- Once all the required columns are selected, press 'Next'.
- You'll then be presented with a second box, choose 'Export'
- Once the file is ready, you'll be presented with a blue dialogue box in HubSpot. Press the text on the box to download the spreadsheet.

Part 2 - Creating the Register file
- Navigate to I:\Teaching School Hub\3.4 Early Career Framework.
- In the folder is a file called 'Register template' which you will use to create your registers.
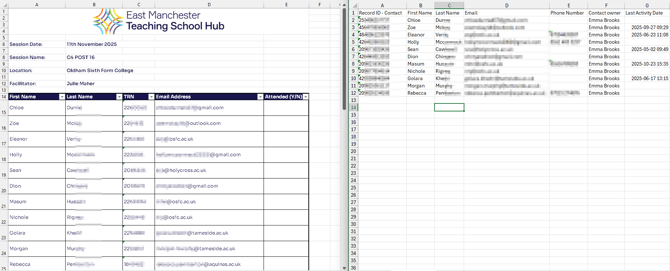
- Open up both your exported file, and the register template and put them side-by-side.
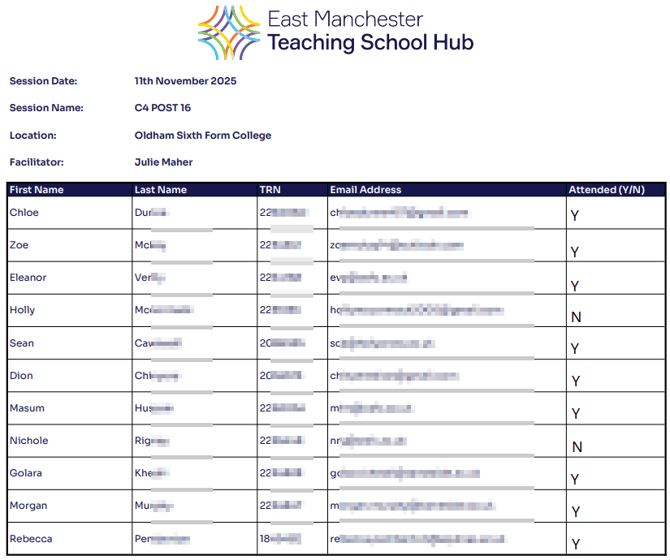
- Input the Session Date, Name, Location, and Facilitator for the specific session in the top of the register template file.
Please note: The Session Name cell is a drop down list containing all current clusters rather than needing to type each individual cluster code in.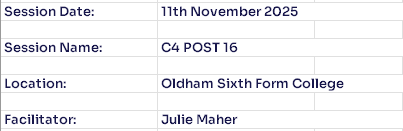
- In the Hubspot export file, highlight the names, email addresses, and TRNs of the ECTs and Press Ctrl+C
- Then in the designated cells of your register template, press Ctrl+Shift+V, this will paste ONLY the values, and keep the correcting formatting.
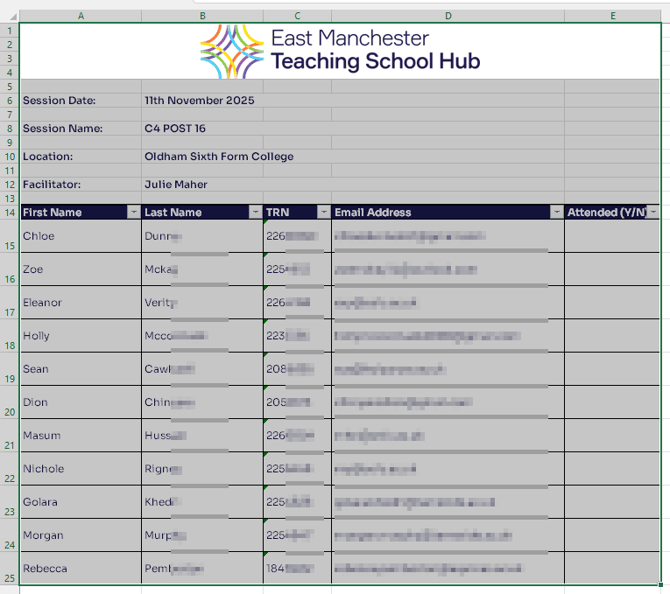
- Once complete, your register should contain each ECT's First Name, Last Name, TRN, and Email Address.
- Select the entire register from the EMTSH logo, down to the last row of the register
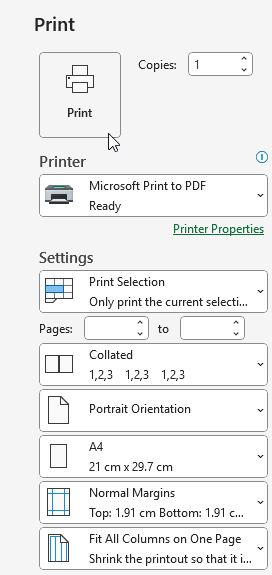
- Press Ctrl+P to open the print dialogue box
- Choose 'Microsoft Print to PDF' as your printer,
- Choose 'Print Selection',
- Choose 'Fit All Columns on One Page',
- Press 'Print',
- You will then be asked to give the file a name and choose a location.
Part 3 - Upload and send via Dropbox Sign
- Head to the Dropbox Sign website (https://app.hellosign.com/) and login.
- In the top-left corner, choose 'Sign documents'.

- Drag-and-drop your PDF register into the centre box, or use the 'Upload' button. Once your file is uploaded, press 'Next'.
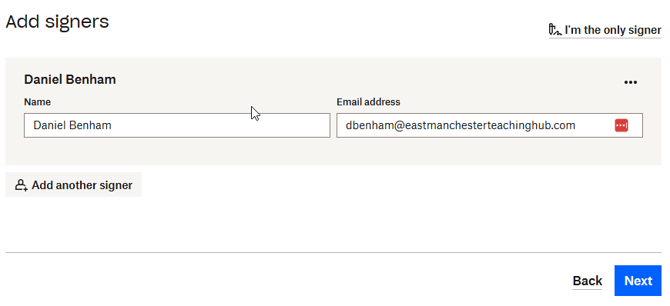
- Type in the signer's name, and their East Manchester email address, then press 'Next'
- In the left column, choose 'Textbox'
- Then click in each of the cells in the Attended column to add a text box until there is a box in each cell

- Press 'Next'
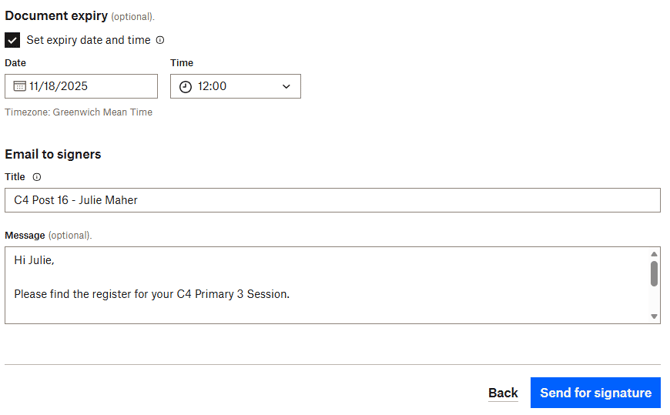
- Set an expiry date for 1 week after the session is due to take place,
- Add a title
Please note: The title should be the cluster code, followed by the facilitator's name - Add a message
Please note: The message should inform the facilitator of the deadline date for competing the register. - Press 'Send for signature'
- Until the register has been completed, it will say 'Pending signature'.

- Once the facilitator has completed the register and sent it back, it will say 'Signed'. You can then press 'Download PDF' and use this document to update your records